Unlocking Edge ML: From PyTorch to Edge Deployment


Table of Contents
Table of Contents
info
This blog post is still a work in progress. If you require further clarifications before the contents are finalized, please get in touch with me here, on LinkedIn, or Twitter.
🚀 Motivation - Edge Deployment
It’s 2024, everyone seems to be talking about complex and larger models.
Sophisticated models perform well at specific tasks. But they come with the cost of massive computational power.
Typically that’s available in cloud-based environments. Cloud-based environments has limitations, such as latency, bandwidth constraints, and privacy concerns.
This is when edge deployment comes into play.
In simple terms, edge deployment means running a model close to the source of the data. For example running a face recognition model on an IPhone.
Why edge deployment:
-
Low Latency: Edge devices process data locally. This reduces the time it takes for a model to produce an output.
-
Privacy: Your data stays on the device. This reduces the risk of data breaches and better compliance with data privacy regulations.
-
Robustness: Edge devices can function with or without an internet connection. This provides reliability and robustness.
note
But, there’s a caveat - Edge devices often have limited computational resources.
This is why large models typically go through optimizations before it is deployed on edge devices. In this blog post, we’ll look into ONNX, OpenVINO and TFlite - some of the most popular form of deployement format.
In this post, you’ll learn how to convert PyTorch Image Models (TIMM) into ONNX format, a crucial step in preparing your models for efficient edge deployment.
tip
By the end of this post you’ll learn how to
- Load any model from TIMM.
- Convert the model into ONNX, OpenVINO and TFlite format.
- Optmize the model to improve inference latency.
The codes for this post are on my GitHub repo.
But first, let’s load a PyTorch computer vision model from TIMM.
🖼️ Torch Image Models (TIMM)
TIMM, or Torch Image Models, is a Python library that provides a collection of pre-trained machine learning models specifically designed for computer vision tasks.
To date, TIMM provides more than 1000 state-of-the-art computer vision models trained on various datasets. Many state-of-the-art models are also build using TIMM.
Install TIMM by running:
pip install timm
I’m using version timm==1.0.9 in the post.
Presently there are 1212 models on timm as listed on Hugging Face.
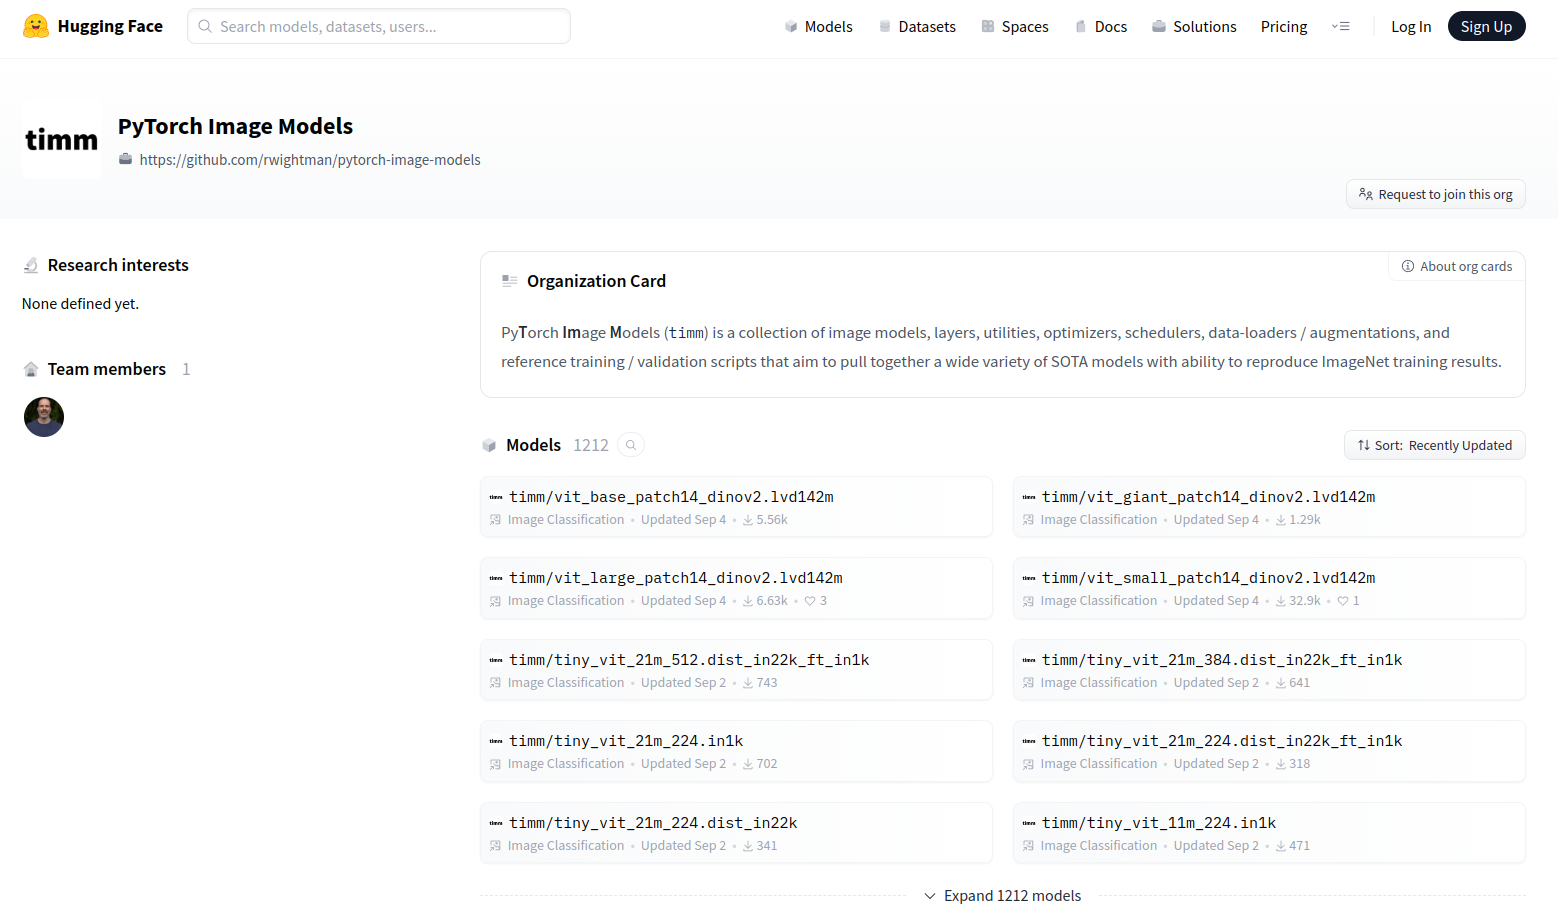
Over a thousand pre-trained models on TIMM.
Once installed load any model with 2 lines of code:
import timm
model = timm.create_model('convnextv2_base.fcmae_ft_in22k_in1k',
                          pretrained=True)
Now, put model in evaluation mode for inference.
model = model.eval()
Next let’s load an image from the web.
from urllib.request import urlopen
from PIL import Image

img = Image.open(urlopen(
    'https://huggingface.co/datasets/huggingface/documentation-images/resolve/main/beignets-task-guide.png'
))

img

Next let’s get the model’s specific transforms
data_config = timm.data.resolve_model_data_config(model)
transforms = timm.data.create_transform(**data_config, is_training=False)
With the right transforms we can run an inference on the downloaded image.
output = model(transforms(img).unsqueeze(0)) # unsqueeze single image into batch of 1
And view the results
top5_probabilities, top5_class_indices = torch.topk(output.softmax(dim=1) * 100, k=5)

top5_probabilities
>>> tensor([[12.4517,  8.8304,  5.8010,  3.0997,  3.0730]], grad_fn=<TopkBackward0>)

top5_class_indices
>>> tensor([[968, 967, 969, 960, 504]])

output.shape
>>> torch.Size([1, 1000])
To view the class names we load the ImageNet classe names with the corresponding index from the inference results.
from imagenet_classes import IMAGENET2012_CLASSES

# Retrieving class names
im_classes = list(IMAGENET2012_CLASSES.values())
class_names = [im_classes[i] for i in top5_class_indices[0]]

class_names
>>> ['cup', 'espresso', 'eggnog', 'chocolate sauce, chocolate syrup', 'coffee mug']
Now let’s measure the inference time on CPU.
import time
num_images = 100

with torch.inference_mode():
    start = time.perf_counter()
    for _ in range(num_images):
        model(transforms(img).unsqueeze(0))
    end = time.perf_counter()
    time_taken = end - start
print(
    f"PyTorch model on CPU: {time_taken/num_images*1000:.3f} ms per image,\n"
    f"FPS: {num_images/time_taken:.2f}")
>>> PyTorch model on CPU: 109.419 ms per image,
>>> FPS: 9.14
There we have a baseline of 9.14 FPS on a pure PyTorch model (Intel® Core™ i9-11900 @ 2.50GHz × 16 ).
warning
Although the inference time is reasonable, deploying PyTorch models directly into production environments has disadvantages:
-
Large Dependency: PyTorch requires numerous dependencies, challenging for resource-constrained environments.
-
Deployment Complexity: Packaging PyTorch models with dependencies is complex in containerized/serverless environments.
-
Version Compatibility: Ensuring PyTorch version compatibility between development and production can be difficult.
-
Resource Usage: PyTorch models often consume more memory and computational resources than optimized formats.
-
Platform Limitations: Some platforms or edge devices may not support PyTorch natively.
🏆 ONNX (Open Neural Network Exchange)
ONNX is an open format built to represent machine learning models. It defines a common set of operators - the building blocks of machine learning and deep learning models - and a common file format to enable AI developers to use models with a variety of frameworks, tools, runtimes, and compilers.
With ONNX, you can train a machine learning model in one framework (e.g. PyTorch) use the trained model in another (e.g. Tensorflow)
note
💫 In short, ONNX offers two benefits that helps edge deployment:
- Interoperability - Develop in your preferred framework and not worry about deployment contranints.
- Hardware access - ONNX compatible runtimes can maximize performance across hardware.
So let’s now convert our PyTorch model to ONNX format.
🔁 PyTorch to ONNX
Since we loaded our model from TIMM, we can use the timm library utils to export the model to ONNX.
Before that, make sure onnx is installed.
pip install onnx
python onnx_export.py convnextv2_base.fcmae_ft_in22k_in1k.onnx \
    --model timm/convnextv2_base.fcmae_ft_in22k_in1k \
    --opset 16 \
    --reparam \
Sometimes, the above command might not work. In that case, we can manually reparameterize the model and export it to ONNX.
from timm.utils.model import reparameterize_model
model = reparameterize_model(model)
Reparameterizing the model reduces/combines the number of parameters in the model, which can help improve the inference speed.
Once done, we can export the model using PyTorch’s built-in torch.onnx.export function.
import torch.onnx
torch.onnx.export(
    model, # PyTorch model
    torch.rand(1, 3, 224, 224, requires_grad=True), # dummy input
    "convnextv2_base.fcmae_ft_in22k_in1k.onnx", # output file name
    export_params=True,
    opset_version=16,
    do_constant_folding=True,
    input_names=['input'],
    output_names=['output'],
    dynamic_axes={'input' : {0 : 'batch_size'},
                  'output' : {0 : 'batch_size'}}
)
tip
Description of the parameters:
-
dynamic_axes: Allows the ONNX model to accept inputs of different sizes. Usually, the first dimension of the input is the batch size and we want the model to be able to handle different batch sizes at inference time. With this, we can run inference on 1 image, 10 images, or 100 images without changing the model at inference time. -
do_constant_folding=True- This optimizes the model by folding constants, which can improve inference speed and reduce the size of the model.
More on torch.onnx.export here.
Sometimes the resulting ONNX file becomes unnecessarily complicated. We can simplify the converted ONNX model using a tool like onnx-simplifier.
note
This is not strictly necessary, but it may help reduce the size of the model and improve inference speed.
Let’s start by installing onnx-simplifier.
pip install onnxsim
Run the following CLI command to simplify the ONNX model by specifying the input and output file names.
onnxsim convnextv2_base.fcmae_ft_in22k_in1k.onnx \
        convnextv2_base.fcmae_ft_in22k_in1k_simplified.onnx
The output will show the difference between the original and simplified model.
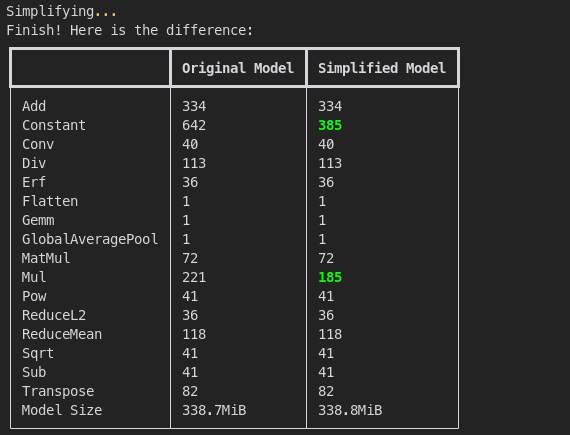
The difference between the original and simplified model.
Looks like the simplified model has fewer Constant and Mul operations but the model size remains the same. The result is a new file convnextv2_base.fcmae_ft_in22k_in1k_simplified.onnx.
To run an inference in ONNX, install onnxruntime:
pip install onnxruntime
Now let’s load the simplified ONNX model and run an inference using onnxruntime.
onnxruntime can run on CPU, GPU, or other hardware accelerators. For the sake of simplicity, we’ll run the inference on CPU. After all, majority of edge devices are CPU-based.
import numpy as np
import onnxruntime as ort
from PIL import Image
from urllib.request import urlopen

# Load an image
img = img.convert('RGB')
img = img.resize((224, 224))
img_np = np.array(img).astype(np.float32)

# Load ONNX model
session = ort.InferenceSession(
                "convnextv2_base.fcmae_ft_in22k_in1k_simplified.onnx",
                providers=['CPUExecutionProvider'])

# Convert data to the shape the ONNX model expects
input_data = np.transpose(img_np, (2, 0, 1))  # Convert to (C, H, W)
input_data = np.expand_dims(input_data, axis=0)  # Add a batch dimension

# Get input name from the model
input_name = session.get_inputs()[0].name
Let’s run an inference and measure the time taken.
import time
num_images = 100

start = time.perf_counter()
for _ in range(num_images):
    session.run(None, {input_name: input_data})
end = time.perf_counter()
time_taken = end - start

print(
    f"ONNX model on CPU: {time_taken/num_images*1000:.3f} ms per image,\n"
    f"FPS: {num_images/time_taken:.2f}")
>>> ONNX model on CPU: 71.991 ms per image,
>>> FPS: 13.89
Not bad! We went from 9.14 FPS to 13.89 FPS!
Plus we don’t need to worry about installing PyTorch anymore on the inference device. All we need is the ONNX file and onnxruntime. This is way more portable!
🪜 ONNX to OpenVINO
import openvino as ov
ov_model = ov.convert_model('dv2s_redo_simplified.onnx')

###### Option 1: Save to OpenVINO IR:

# save model to OpenVINO IR for later use
ov.save_model(ov_model, 'dv2s_redo_simplified.xml')

###### Option 2: Compile and infer with OpenVINO:

# compile model
compiled_model = ov.compile_model(ov_model)

# prepare input_data
import numpy as np
input_data = np.random.rand(1, 3, 224, 224)

# run inference
result = compiled_model(input_data)
💫 ONNX to TFlite with onnx2tf
onnx2tf is a tool to convert ONNX files (NCHW) to TensorFlow/TFLite/Keras format (NHWC).
💥 PyTorch to OpenVINO
import openvino.torch
model = torch.compile(model, backend='openvino')
# OR
model = torch.compile(model, backend='openvino_ts')
note
openvino- With this backend, Torch FX subgraphs are directly converted to OpenVINO representation without any additional PyTorch based tracing/scripting.openvino_ts- With this backend, Torch FX subgraphs are first traced/scripted with PyTorch Torchscript, and then converted to OpenVINO representation.
import openvino as ov

# Create OpenVINO Core object instance
core = ov.Core()

# Convert model to openvino.runtime.Model object
ov_model = ov.convert_model(model)

MODEL_NAME = "DINOV2S"
# Save openvino.runtime.Model object on disk
ov.save_model(ov_model, f"{MODEL_NAME}_dynamic.xml")

# Load OpenVINO model on device
compiled_model = core.compile_model(ov_model, 'AUTO')

input_tensor=transforms(img).unsqueeze(0)
result = compiled_model(input_tensor)[0]
🏁 Wrap Up
- GitHub
- Telegram
🤟 Follow me
Don't want to miss any of my future content? Follow me on Twitter and LinkedIn where I share these tips in bite-size posts.
🔄 Share this post
❤️ Show some love
Creating free ML contents doesn't pay my bills. Support me in creating more free contents like these. Consider buying me a coffee. Your support means a lot to me.
