Deploying Object Detection Models on Hugging Face Spaces


Table of Contents
Introduction
So, you’ve trained a deep learning model that can detect objects from images. Next, how can you share the awesomeness of your model with the rest of the world? You might be a PhD student trying to get some ideas from your peers or supervisors, or a startup founder who wishes to share a minimum viable product to your clients for feedback. But, at the same time you don’t wish to go through the hassle of dealing with MLOps. This blog post is for you. In this post I will walk you through how to deploy your model and share them to the world for free!
Training a Model with IceVision
We will be using the awesome IceVision object detection package as an example for this post. IceVision is an agnostic computer vision library pluggable to multiple deep learning frameworks such as Fastai and PyTorch Lightning. What makes IceVision awesome is you can train state-of-the-art object detection models with only few lines of codes. It’s very easy to get started, check out the tutorial here.
In the getting started notebook, we used a dataset from Icedata repository known as the Fridge Objects dataset. This dataset consists 134 images of 4 classes: can, carton, milk bottle, water bottle. Let’s now continue to train our model. Let’s train a VFNet model with a ResNet backbone implemented in mmdet. In the notebook, you can easily specify this model using two lines of codes as follows.
| |
After you’re satisfied with the performance of your model, let’s save the model into a checkpoint to be used for inferencing later. With IceVision this can be done easily. Just add the following snippet to your notebook and run.
| |
Feel free to modify the model_name, backbone_name according to the model you used during training.
The img_size argument is image size that the model is trained on.
The classes argument is a list of classes from the dataset.
The filename argument specifies the directory and name of the checkpoint file.
The meta argument stores other metadata that you would like to keep track of for future reference.
The notebook that I used for this section can be found here.
User Interface with Gradio
At this point, in order to run inference on the model, one will need to write inference codes as shown here. This is non-trivial and can be time-consuming especially to those who are not familiar. Gradio simplifies this by providing a simple graphical user interface wrapping the inference code so that anyone can run inference on the model without having to code.
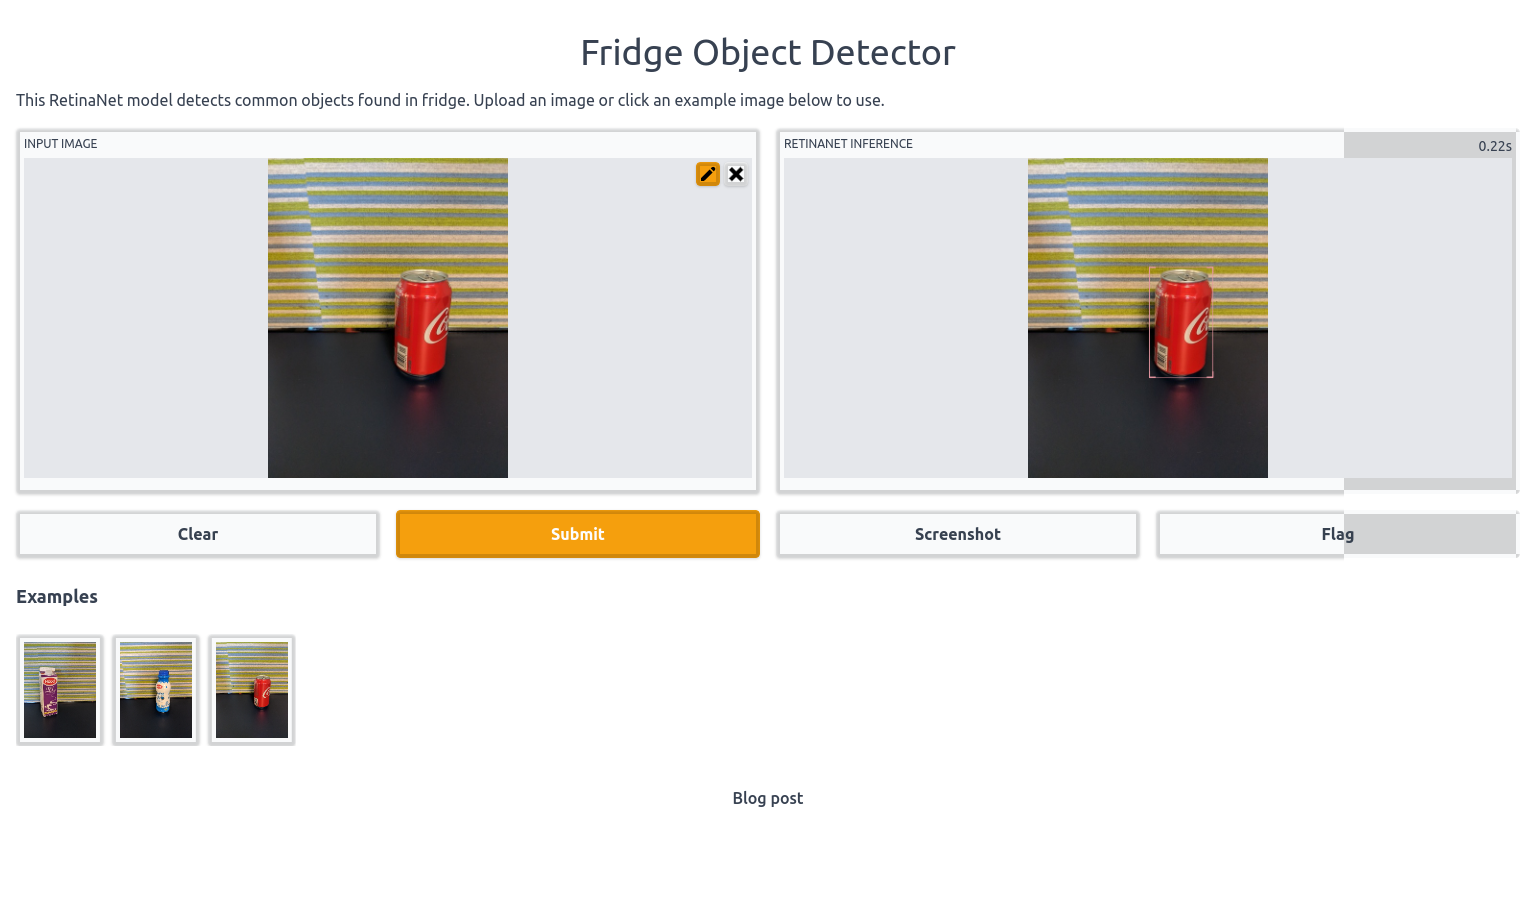
The following figure shows a screenshot of the Gradio app that runs in the browser. The left pane shows the input image, and the right pane shows the inference results. Users can upload an image or select from a list of example images and click on Submit to run it through the model for inference.
So how do we load our model into the Gradio app? First, we must first install the Gradio package by running pip install gradio.
Next, create a file with the name app.py and paste the following codes into the file.
| |
Make sure that the path to your model checkpoint and example images are correct.
Running the app.py loads our model into the Gradio app.
Run the script by typing python app.py in the terminal.
If there are no errors, the terminal will show local URL to access the Gradio app.
You can copy the address and open it with a browser.
The URL address on my machine is http://127.0.0.1:7860/, it may vary on yours.
Hugging Face Spaces
The Gradio app URL link from the previous section can only be accessed locally. But what if you would like to share the link to someone across the internet for free? In this section, we will discover how to make your Gradio app accessible to anyone by deploying the app on a free platform known as HuggingFace Spaces. Spaces is the new ‘marketplace’ for various bleeding edge machine learning models. Many researchers have uploaded interesting and state-of-the-art models on Space to showcase them as a demo. You can discover and try them out here.
Creating a Space
To host a model on Spaces, you must sign up for an account at https://huggingface.co/.
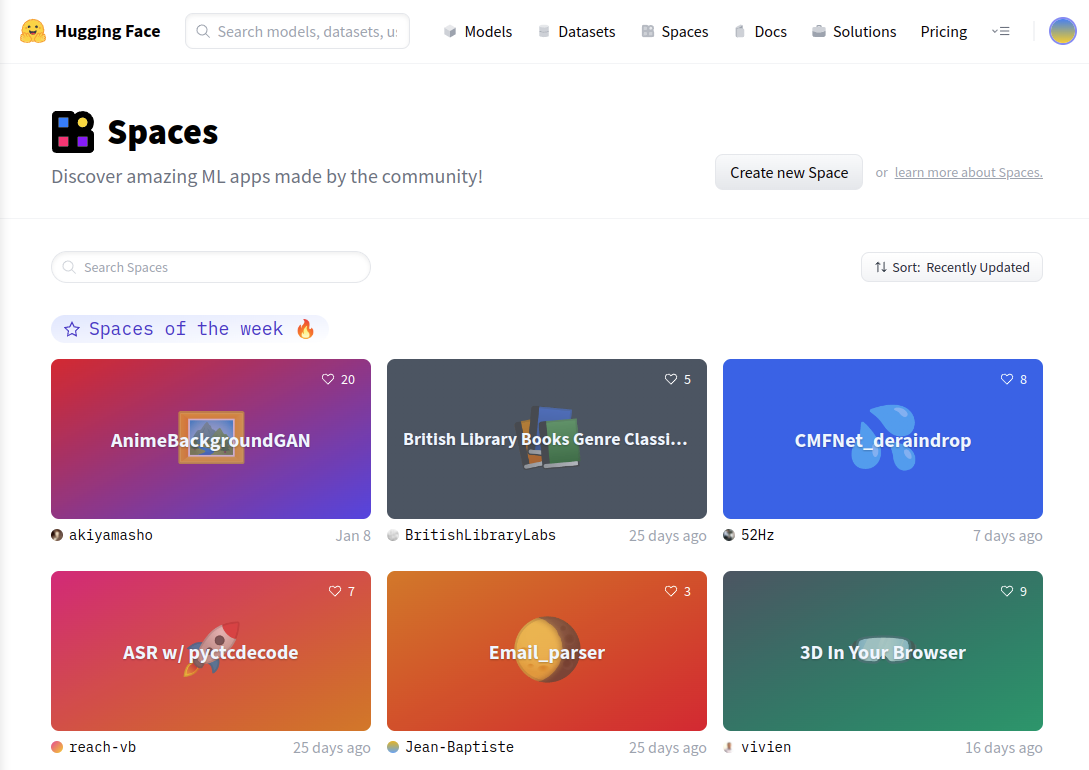
After that, head over to https://huggingface.co/spaces and click on Create New Space button as shown below.
Next fill in the Space name and select a License. Make sure to select Gradio as the Space SDK and keep the repository Public. Click on Create space button when you’re done.

Once done, your Space is now ready.
The Space you’ve created behaves like a git repository.
You can perform various git related operations such as git clone, git push and git pull to update the repository.
Alternatively, you can also add files into the Space directly in the browser.
![]()
Installation files
Let’s start with the installation files. These are the files that determines the packages that will be installed on your Space to run your app.
The packages are specified in two files ie. requirements.txt, and packages.txt.
The requirements.txt lists all the Python packages that will be pip-installed on the Space.
The packages.txt is a file created to specify the OpenCV version to be installed on your Space.
This package will be read and installed with apt-get install.
For some reason putting the opencv-python package in the requirements.txt file doesn’t work.
Let’s begin adding these files.
Click on the Files and versions tab. Next, click on Add file and Create a new file.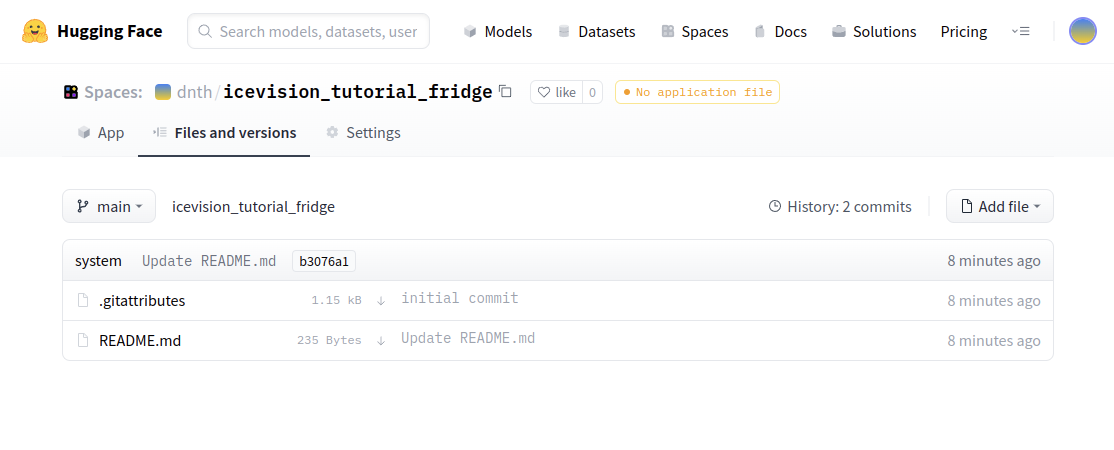
Name your file as requirements.txt and paste the following snippets as the content. Click on Commit new file button at the bottom of the page.
| |
Now, do the same for packages.txt which only has the OpenCV package as the file content.
| |
We are now done adding all installation files into our Space.
Gradio application file
Next let’s add the Gradio app, model checkpoint and some sample images.
Let’s add the app.py we had from the previous section using the same method we did for the installation files.
The app.py hosts the logic of your application and this is where the code for the Gradio app resides.
Space will automatically run app.py upon startup.
Model checkpoint and samples
Next let’s add our checkpoint file model_checkpoint.pth by clicking on Upload File.
Drag and drop the model checkpoint file and click on Commit changes.
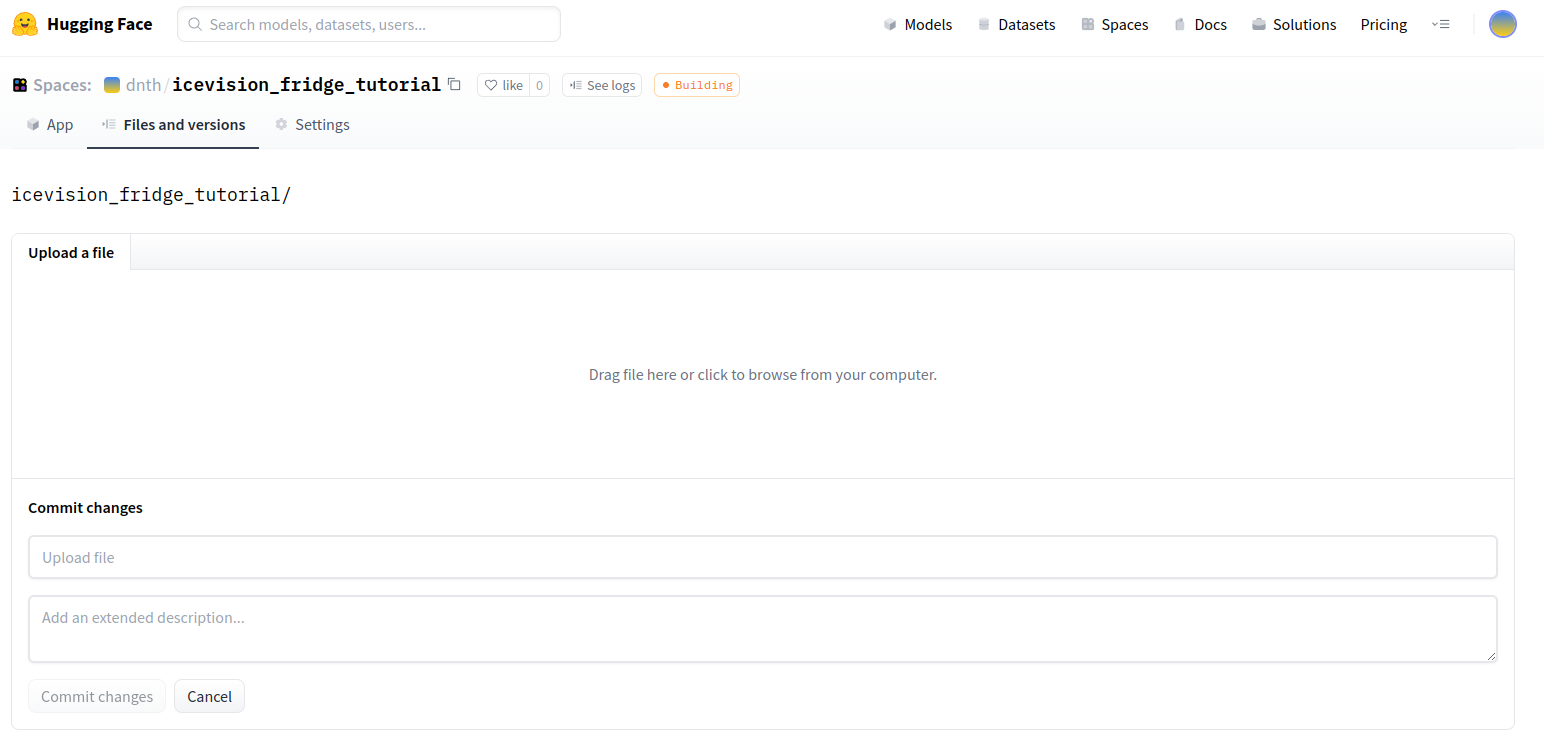
You will also see a Building status indicating that it is setting up by installing the packages and running it upon completion. Every time there is a change in any of the files, the Space will be rebuilt.
Using the same method let’s upload the sample images as well.
Make sure the filename of your sample image matches the filename specified in line 20-24 of app.py.
20examples = [
21    ['1.jpg'],
22    ['2.jpg'],
23    ['3.jpg']
24]
At this point the Space repository should look like the following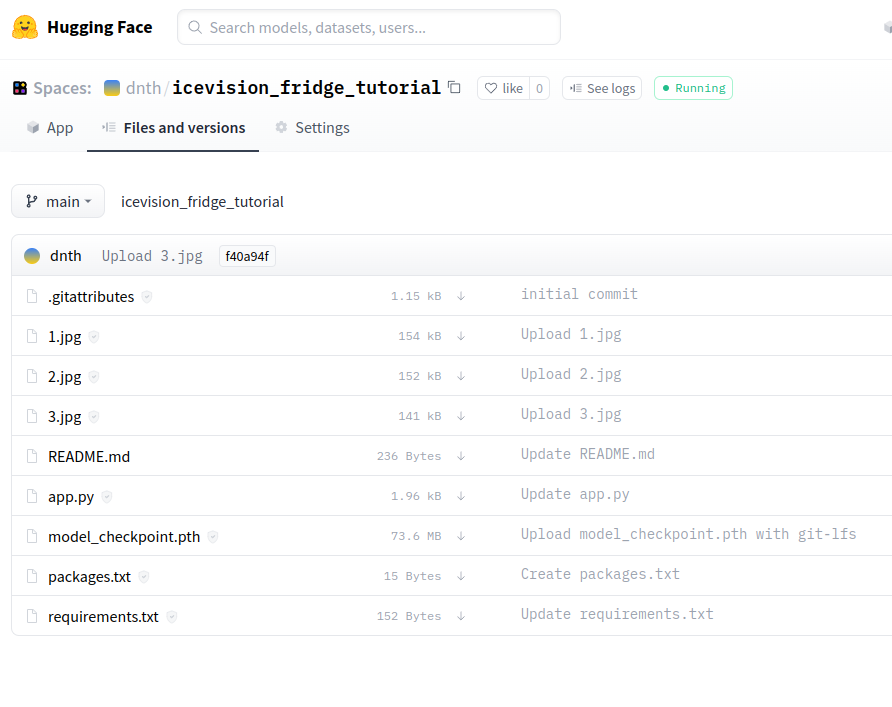
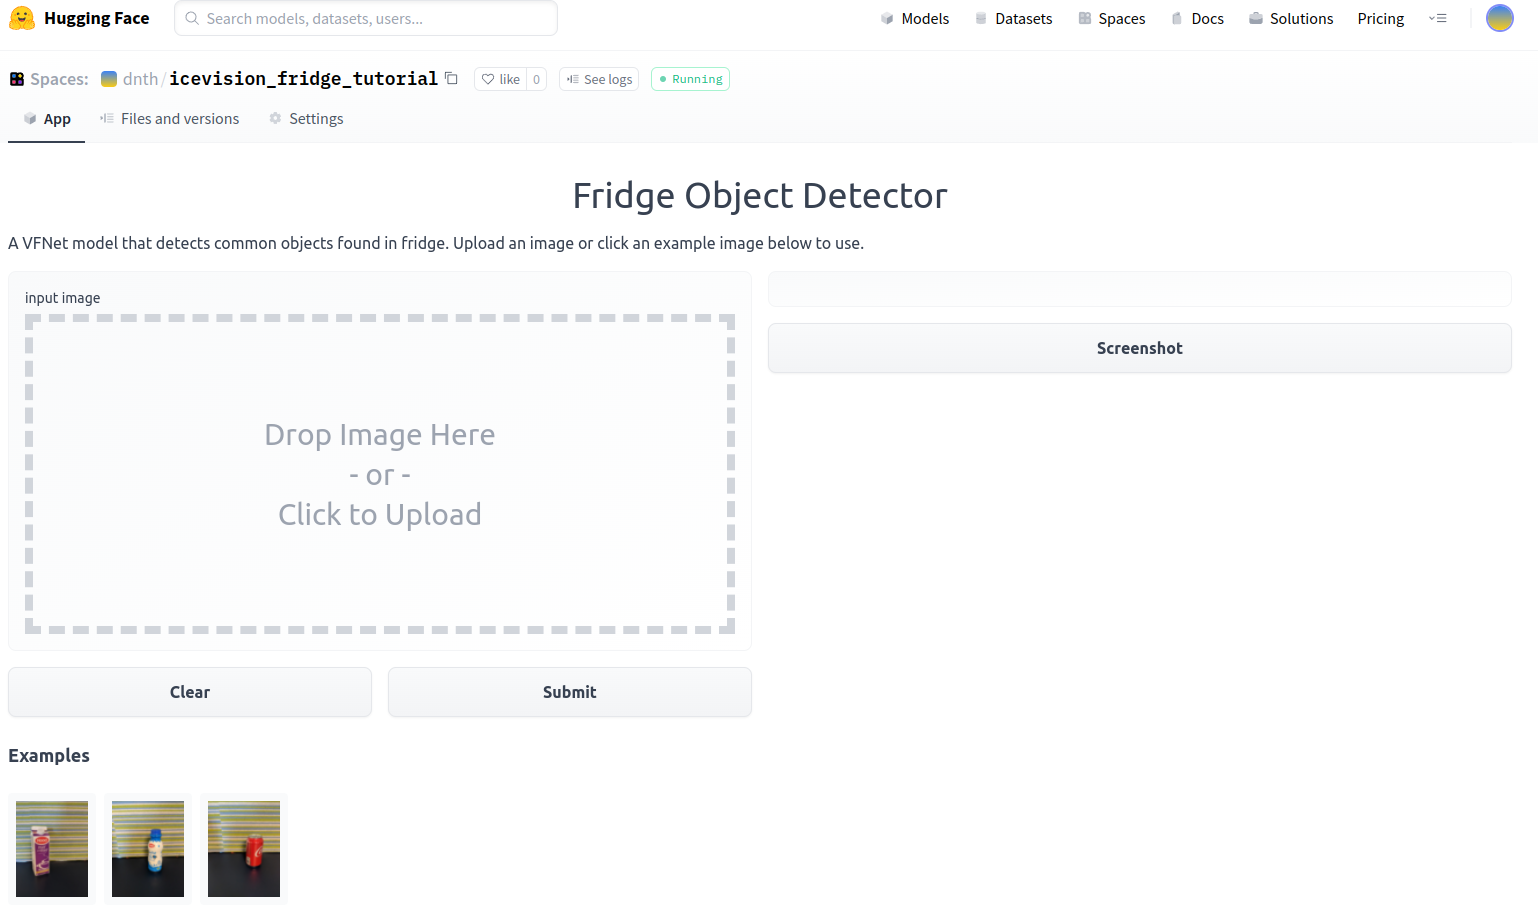
The completed app looks like the following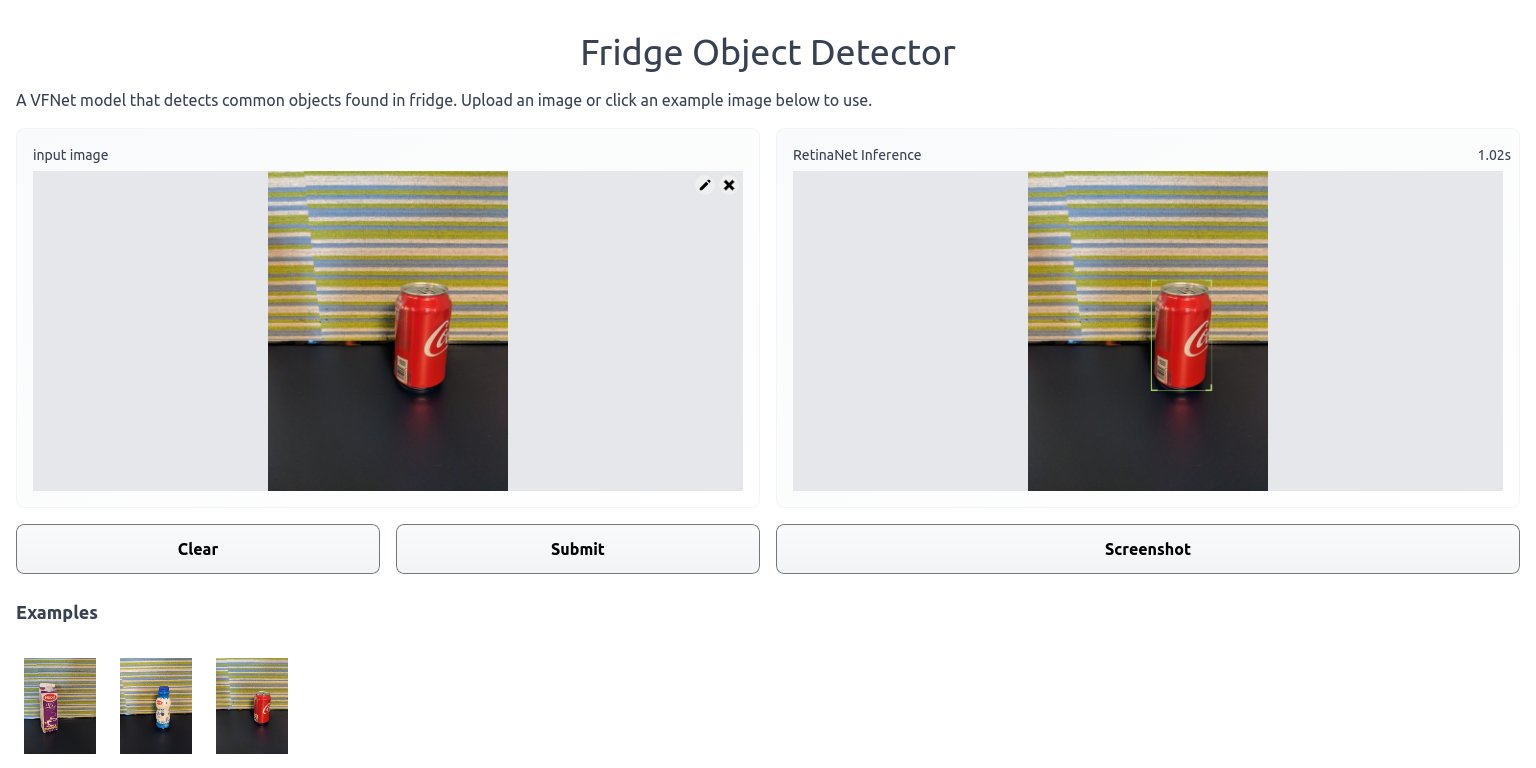
Conclusion
This blog post outlined a step-by-step guide on how you can deploy IceVision models on HuggingFace Space in just a few steps. Hope this helps you share the awesomeness of your model to anyone across the world. The Space used in this blog post can be found here.
You can also embed the running app on any webpage in your HTML code like the following:
- GitHub
- Scholar
- Telegram
🤟 Follow me
Don't want to miss any of my future content? Follow me on Twitter and LinkedIn where I share these tips in bite-size posts.
🔄 Share this post
❤️ Show some love
Creating free ML contents doesn't pay my bills. Support me in creating more free contents like these. Consider buying me a coffee. Your support means a lot to me.
